Thursday, July 28, 2011

More film fun - Ilford HP Plus


I have been waiting to get my roll of Ilford HP5 Plus back from London Drugs so I could share my images and talk about the experience of shooting with it. I got it back on Monday after almost three weeks. In fact, let's maybe talk about the more negative part of the whole experience first before going to the fun. (Pun not intended).

So yes.  Almost three weeks to get my film developed. I wasn't expecting one hour or anything like that but I was expecting it to be sooner than that. Alright, its film so I can probably overlook that. When I got the call and picked up my package however, I was floored by the price. Developing, printing, scanning and the CD for the images with tax was a grand total of $52.42. If I include the price of the film ($7.65 with tax) this takes me to over 60 bucks. I am pretty sure a mistake was made because rolls I have had developed in the past were around half of that. 34.95 of that total is for the prints which they apparently charged 99 cents per image for. I am not sure why they asked if I wanted 1 or 2 prints and failed to mention that each would cost my 99 cents.

Then I had a look at the images and it appears that a) they made their prints from the scans and NOT the negatives b) they made contrast adjustments to the images. I can kinda see why they would make contrast adjustments but I am really angry that they made the prints from the scans and not the negatives. Had I known this I would have elected to get no prints and just go with the scanned images. If there was anything I wanted to be printed I'd do it myself or send it in at that point.  On this point, I may go in and raise a ruckus and get it done right.  Suffice to say I won't be getting them to do any more rolls for me.

Update (July 29th, 2011): I went in today to raise my ruckus. It wasn't much of a ruckus I have to admit and I did learn a bit. Am I doing a retraction? Nope. However I cleared up a few things that I'll put in here. First off the prints were from the negatives. Secondly the cost for the prints was indeed 99 cents per print. They used to be 79 cents so London Drugs was kind enough to credit me the difference.  I should have realized this before but London Drugs has another company do their black and white prints and processing - Custom  Care in Vancouver. What I found interesting is London Drugs charges me 99 cents per print. Custom care will develop my roll for $5.50 a roll and prints appear to be $10.75 for a roll of 36. I'll have to look into this some more.


Which brings me to one more point before I carry on to the happier part of this post. I am going to have to learn how to develop my own film. The only thing stopping me before was a fear of messing up a roll of good shots. However, if I can do it faster and cheaper myself and have control over the process why the heck wouldn't I? If I botch a couple of rolls learning how to develop my film so be it. I guess I need to give myself more credit and know that I can probably figure it out and not botch any too.  In fact I think there's a link on this very page to the section of Ilford's website that talks about this very thing.  And on that note...I'll put my happy face on again. :)


Shooting black and white is a little challenging in that you have to try to see your subject in monochrome. Some subjects work well in black and white. Others do not. I find that landscapes and architecture work really well while portraits have a nice classic look to them when shot with black and white film.  For all of my shots I used my Nikon N8008S for the body and used my 50 mm f/1.8 (as opposed to my 50 mm f/1.4 I did with my last batch of slide film).   For a lot of my shots I used a red filter to try to achieve greater contrast in the skies.

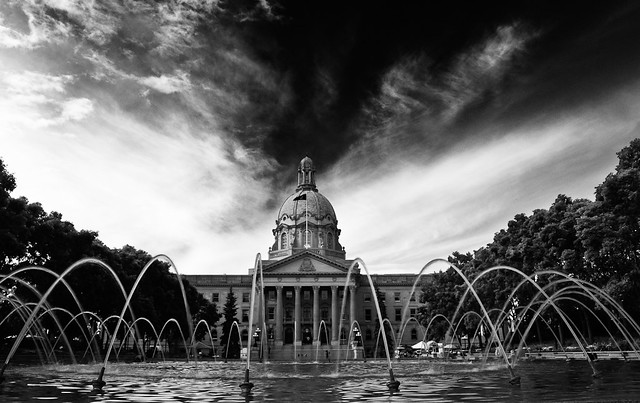
The results are far more subtle than my digital images converted to black and white. These two images are of the Alberta Art Gallery in Edmonton. There is a slightly different perspective but you can definitely see a difference between the two images.

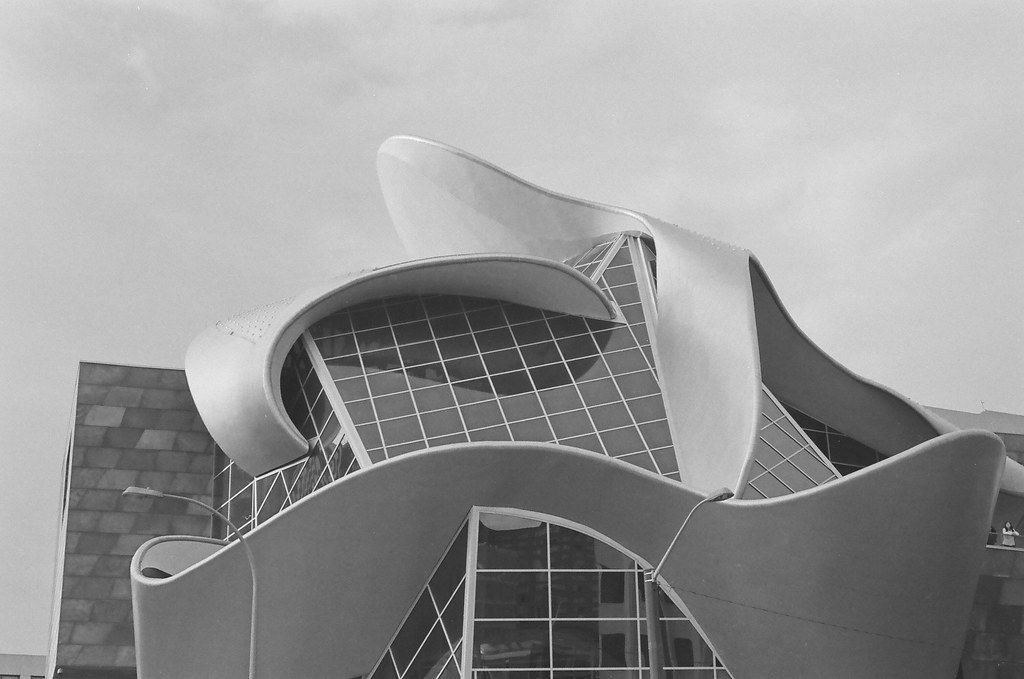
Alberta Art Gallery - Ilford HP 5 Plus

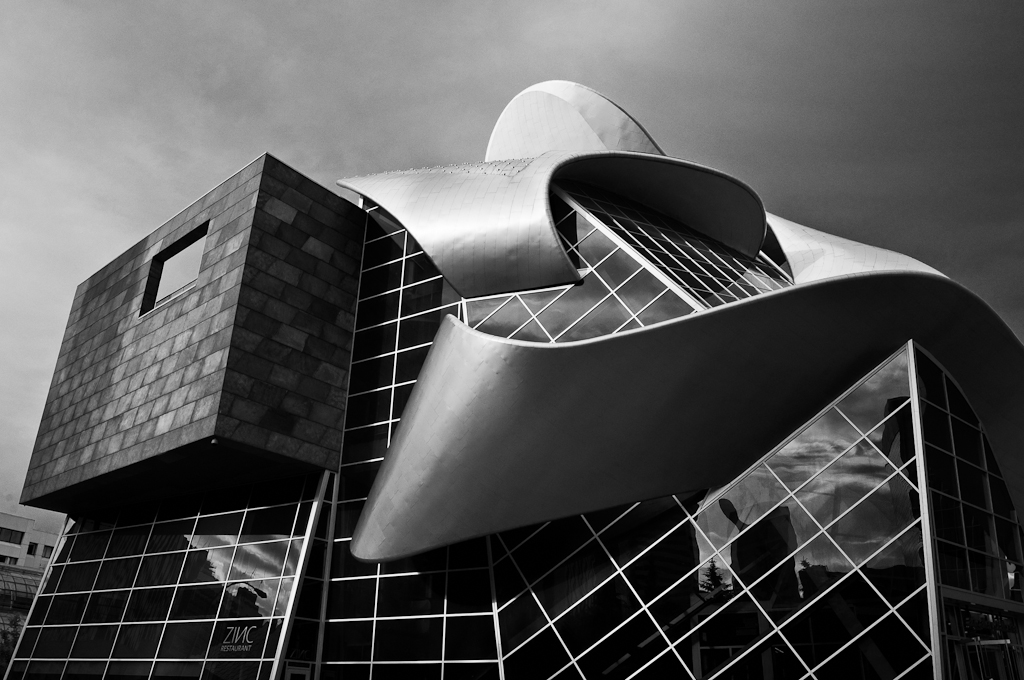
Alberta Art Gallery - Nikon D90 image converted to black and white in Silver Efex Prod


Interestingly enough (and I admit this grudgingly) London Drugs did rescue one or two of my shots. I had one of the falls at Big Hill Springs Provincial Park that I had grossly underexposed that they managed to get a decent enough image from the negative. It lacks a lot of contrast but aside from that it is a usable image.
A better exposed version of the same scene
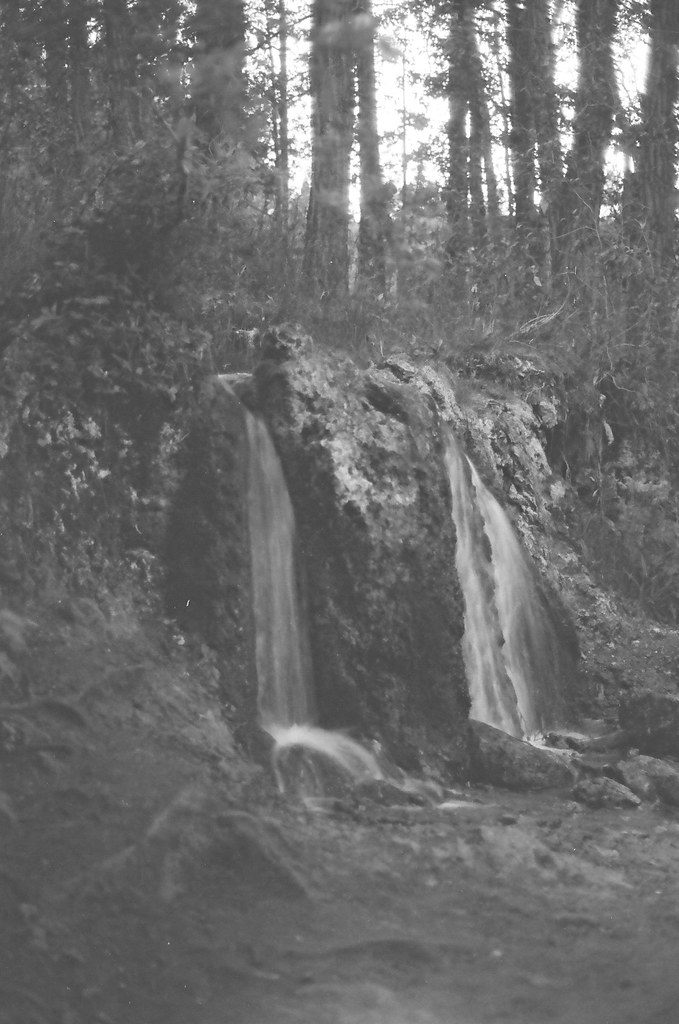
A salvaged under exposed image


Overall, I have mixed feelings about this roll. On the one hand I got some pretty interesting shots. On the other hand, it cost me an arm and a leg and some of the results were skewed by London Drugs. I have another roll sitting in my fridge but I think I will wait until I am ready to develop it myself before shooting with it.

To check out all of the images on the roll check out the set on my Flickr Stream

Wednesday, July 13, 2011

iPhoneography


Like many photographers, I pack my camera with me pretty much everywhere I go. Great shots are all around us and you need to be prepared. Even so, there are times when I want to take a quick picture but I don't want to dig my camera out of my bag. For these occasions, my iPhone is perfect. At 4MP I can get a decent shot. Certainly it has a small sensor to stuff those pixels into which affects the quality but sometimes good enough is good enough.

The other thing I like is that it has integration with photosharing and social media websites like Twitter, Facebook and Flickr. My creations can be shared immediately but they can also easily add a visual element to what I am sharing.

Camera+ for the iPhone
The iPhone also has a lot of different apps so I edit my shots in creative and interesting ways that I may not even attempt with Lightroom or Photoshop. A lot of the effects tend to replicate old film but some of the effects are more modern. Camera+, Instagram, Hipstamatic, and Photoshop Express are a few of my favorites. 


High Contrast scenes like this one are difficult to capture with any camera.
The in-camera HDR option allowed me to successfully get this shot though
I also like the in-camera HDR that the native camera app allows me to use. The iPhone has limited dynamic range so high contrast scenes are hard to capture. The HDR option allows me to compensate for this to a certain extent.

One small feature, which actually made me decide to get the iPhone instead of the Google Android is the flash. Yes it's right beside the lens so it's not ideal but it does allow me to add a bit of fill light. One knock against the iPhone is how it performs in low light so the flash helps. I haven't tried triggering another flash with it so I am curious to try.

The iPhone isn't going to replace my dSLR however it's good enough to act as a point & shoot and give me another way of expressing myself photographically.

Check out my iPhone images on my Flickr steam

Tuesday, July 5, 2011

Shooting babies in front of their moms! Eeek!


Catchy title but not as bad as it sounds. Perhaps it would be better stated to say that I took pictures of baby geese instead but what the heck. I may as well go for the cheap laugh.

All kidding aside, this was a great shoot back in early June. The babies are a lot cuter in the beginning of May but I didn't get out at that time unfortunately. These guys were in their "tweens". Now that we are in July, they are definitely gangly teenagers and are starting to get their feathers so they look awkward and a little ugly. Kinda like human teenagers I would say.

The goslings are pretty much an annual event for me. To be honest, they all look the same but its hard to resist sitting down and watching them. There are certain subjects that I find interesting to shoot and the goslings are one of the big ones. I haven't tagged all of the shots I have taken of them but I probably have about a thousand or so frames of their fuzzy yellow cuteness.

Sunday, July 3, 2011

Black and White is sometimes right


I've been shooting Ilford HP5 plus film for the past week or so. Naturally I haven't got any examples because the roll is still in the camera with eight or so frames left. This weekend, my wife and I went up to Edmonton for a run she was doing and it was a great opportunity to shoot some of the buildings in the capital city's downtown.

Naturally, I also brought my digital camera with me and I was pretty pleased with the images I got. For fun and because I was inspired by shooting black and white film,  I processed some of my favorites using Silver Efex Pro. The program does great monochrome conversions and can emulate a number of well known black and white films. While I didn't try the HP5 option I was pretty pleased with the results.

I always find it interesting how you can get different looks with monochrome by changing a few settings. I remember when I used to process image I would select grayscale if I wanted to do a black and white image. Heck I didn't even know about desaturating to get a black and white! I love the graphic look I get whether its via the channel mixer in Lightroom and Paint Shop Pro X2 or the filter options in Silver Efex Pro.


A great book to learn about digital black and white photography is Michael Freeman's Mastering Black and White Digital Photography. You can also check out the eBook The Power of Black and White over at Craft and Vision for $5.


Some of my other images from this weekend can be found here.